

Taking on a home upgrade can definitely feel overwhelming at first glance, but carving out a dedicated spot for movies, gaming, and binge-watching is surprisingly within reach. You absolutely do not need to hire an expensive contracting crew to capture that immersive cinema magic. A well-thought-out plan, paired with a few weekends of honest work, can completely change how your household experiences entertainment. Finding practical diy home theater ideas that actually fit a normal house is just about knowing where to invest your effort and where you can safely cut corners. The end result is a private sanctuary where you can skip the sticky theater floors, pause the film whenever you want, and enjoy a premium experience right down the hall.
Planning Your Home Theater Renovation
Before you start ordering cables or looking at paint swatches, you need to nail down the logistics of your media room renovation. It is incredibly easy to get distracted by massive screens and towering speakers, but the physical dimensions of your space dictate every single choice you will make. Start by grabbing a tape measure and sketching out a rough floor plan on a piece of scrap paper. You need to know the exact distance from your main viewing wall to where the seating will go. This measurement tells you exactly how large your screen should be. If you buy a screen that is too massive for a shallow room, you will end up with eye strain and neck pain within twenty minutes of hitting play.
Choosing the Right Room
Finding the perfect footprint in your house is half the battle. A dedicated, enclosed space is always ideal because it gives you absolute control over the lighting and the acoustics. This is exactly why a basement home theater build remains the gold standard for renovations. Basements naturally have fewer windows to fight against, and their solid concrete foundations keep heavy bass frequencies from rattling the dishes in the kitchen upstairs. If you are working without a basement, an underutilized spare bedroom or a formal dining room can work beautifully. The primary goal is simply choosing an area where you can block out the afternoon sun and arrange your seating without turning the room into a frustrating obstacle course.
Getting the Sound and Picture Right
The illusion of the cinema comes down to tricking your senses completely. You want a picture that consumes your peripheral vision and audio that wraps entirely around you, pulling you into the scene. Many folks assume achieving this requires maxing out a credit card on the most premium electronics available, but that is a huge misconception. The environment itself plays a massive role in how your gear actually performs. You have to treat the room like a blank canvas and control the variables that ruin sound and picture quality, like bare echoing walls and ambient light spilling in from the hallway.
Why Placement Beats Spending
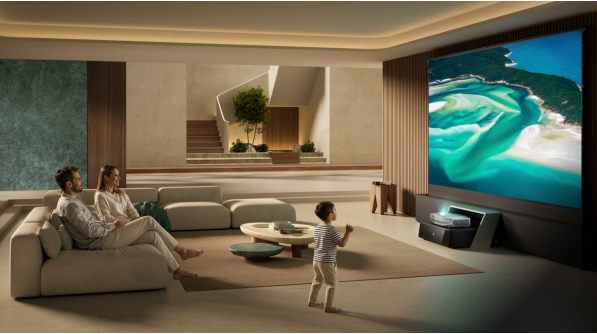
You can purchase a ridiculously expensive surround sound setup, but if you cram all those speakers into the corners of the ceiling, it will sound muddy and terrible. Positioning your front speakers at ear level and ensuring your center channel is pointed directly at the couch gives you incredible clarity without spending an extra dime. The exact same principle applies to your visual setup. Instead of dealing with the glare of a massive glass television panel, many DIYers prefer projection systems for a true theater feel. If you are hunting for a projector for premium streaming, you must ensure your projection surface is perfectly smooth, as any texture on the wall will distort the picture. For rooms where space is tight, utilizing a 4K RGB laser UST projector is an absolute game changer. It sits just inches away from the wall, delivering a gigantic, crystal-clear image without the headache of running long video cables across your ceiling.
Building the Space Yourself
Now comes the phase where you put on some old clothes and get to work. The most vital secret in media room design is light absorption. You really need to paint the walls, and ideally the ceiling, a very dark, flat color. Eggshell, satin, or semi-gloss finishes will reflect the light from your screen right back into the room, washing out all the dark scenes in your movie. A flat matte navy, deep charcoal, or classic black will make the walls practically vanish when the lights go out. If cutting holes in the drywall to run speaker wire sounds terrifying, do not panic. You can easily hide audio cables behind your baseboards or use inexpensive, paintable raceways that run along the floor trim.
Finishing Touches That Make It Feel Real
Pulling off an incredible home theater on a budget usually comes down to getting creative with the final details. You do not need to buy authentic leather cinema loungers on day one. A massive, heavily cushioned sectional couch is often way more inviting and comfortable for a family anyway. Blackout curtains are an absolute necessity if your room has any windows. Furthermore, hanging thick velvet drapes along the back wall is a cheap trick that dramatically reduces audio echo. Grabbing a few affordable acoustic panels online and mounting them at the first reflection points on your side walls will make the dialog in movies sound incredibly crisp and professional. You might even want to slide a small mini-fridge into the corner to keep cold drinks handy without pausing the film.
Avoiding the Most Common DIY Mistakes
Even the most dedicated weekend warriors make a few missteps along the way. One of the most common blunders is entirely forgetting about equipment ventilation. Receivers, amplifiers, and gaming consoles generate a massive amount of heat. If you lock them inside a tight, unventilated media cabinet, they will eventually overheat and fail. Always leave plenty of breathing room around your electronics or install a quiet cooling fan in the back of the cabinet. Another frequent mistake is ignoring the room’s lighting until the very end of the project. A totally pitch-black room is great for the movie, but terrible for walking around. Hook up some smart LED strip lights along the floorboards or right behind your screen. Being able to dim the lights directly from your phone as the opening credits start rolling is the ultimate cinematic flex, and it makes all your hard work completely worth it.
